One of the features that Power BI Services offers to help users manage their workspaces, is the ability to upload an image to represent a given workspace. Below are examples of workspace images that were used for this demonstration.
To upload an image, you need to be the administrator of the workspace. If you create a workspace, you are automatically an administrator. For others to see the workspaces, you need to give them access as a member, admin, contributor, or viewer. If it is your private workspace for developmental or training work, you can just upload your LinkedIn profile picture. Others cannot see this workspace unless you give them access.
Certain workspaces may relate to a theme like finance or medical treatments where related icons can be useful. In a previous Syntrix blog, we talked about how to find medical icons. These icons can be used for your workspace as shown below.
We have two icons. One is of a medical provider and the other is a syringe. All these icons were saved as .png files. We found .png format to be optimal for working with icons.
Images of Power BI workspaces:
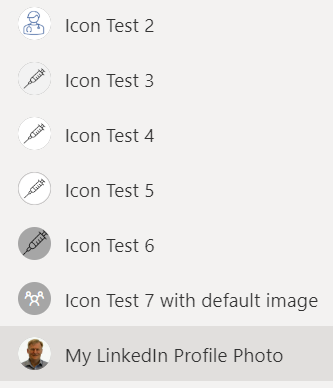
Icon Test 7 shown above is what the default icon looks like. If we open this workspace by clicking on it, we see the expanded view:

Icon Test 6 is a download image from Power Point with no adjustments made to it. As you can see, there is no background circle in the expanded view to give the feel of the original icon. The icon default background in the workspace list is a dark grey. This may not be the background color you prefer.

Icon Test 2 through Icon Test 5 are all created in Power Point. The Icon image was positioned over a circle shape. The circle background and border colors were changed to create the desired look and feel. The two images were grouped and saved as a .png file and then uploaded. Having an array of icons as shown above lets management pick which one they want. Then you can delete the unwanted workspaces. It is important to open the workspace to see how the icon looks. For example, with Icon Test 2 the white background blends in with the white of the workspace and we lose the circle shape.

Perhaps a circle frame is still wanted as in Icon Test 3 or Icon Test 5:


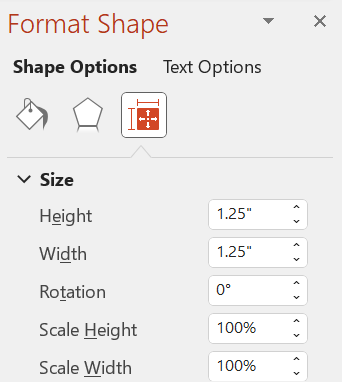
When using Power Point to create the new icon, it is very helpful to use the Format Shape design pane to make sure the height and width are the same. Using the mouse does not give you the precision needed to make a quality icon.
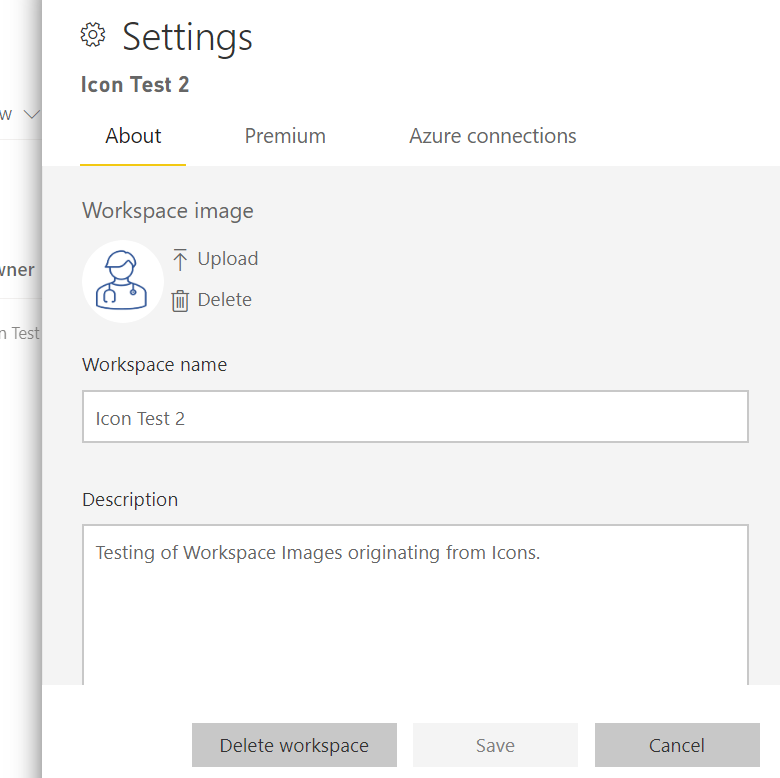
To upload the image to a workspace:
- Click on the workspace.
- Click on Settings.
- Upload the image.
- Save the “Workspace image” with the description.
For Step 2:

For Step 3:
By implementing these steps to create icons, you can personalize and make your workspaces unique to your organization.